
Codex Client
Scope
This guide applies to Codex desktop clients, Codex IDE extensions, and Codex clients that read the local ~/.codex configuration directory. After setup, Codex will call models through the cnAPI relay.
Before You Start
- Sign in to cnAPI.
- Make sure your account has balance.
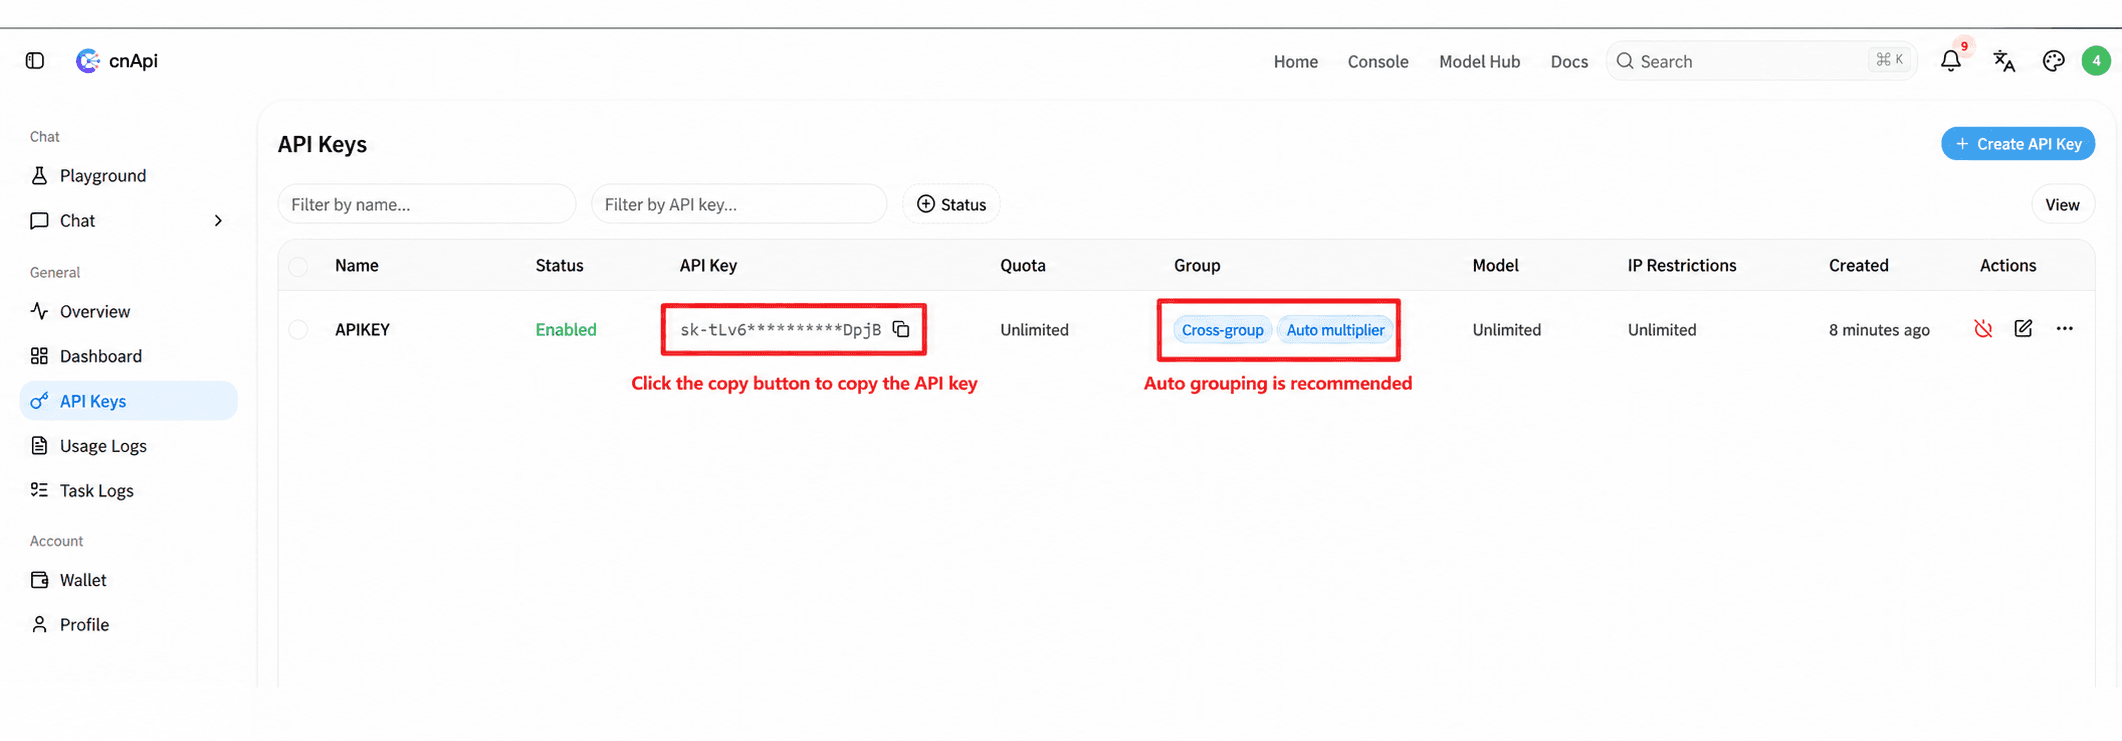
- Create an API key in the cnAPI console.
- Install the Codex client or the related IDE extension.
How It Works
Codex clients read configuration from the local Codex directory:
| File | Purpose |
|---|---|
~/.codex/config.toml | Sets the model, provider, API endpoint, API key, and protocol |
~/.codex/auth.json | OpenAI account login cache; normal cnAPI setup no longer writes API keys here |
Use the following values for the cnAPI relay:
| Option | Value |
|---|---|
| API base URL | https://cnapi.vip/v1 |
| API key | The key created in the cnAPI console |
| Model | gpt-5.6-sol |
| Protocol | responses |
One-Click Setup
Windows
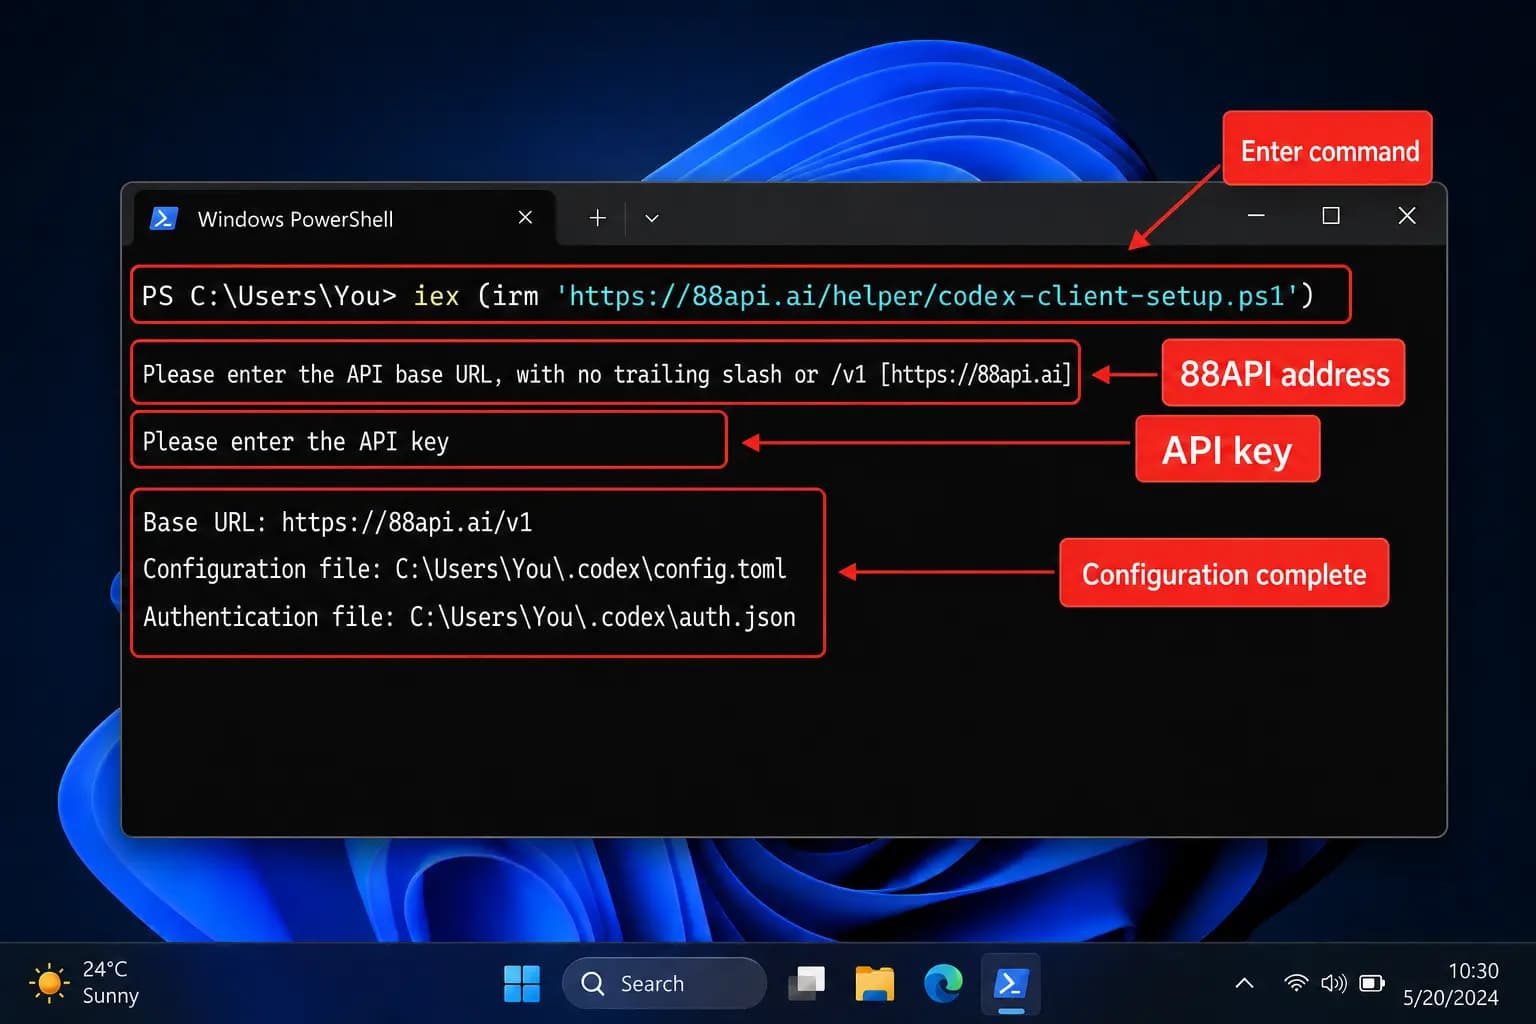
Open PowerShell and run:
Configure Codex Client
Use the following stable Windows command:
curl.exe --ssl-no-revoke -fsSL https://cnapi.vip/helper/codex-client-setup.ps1 -o "$env:TEMP\codex-client-setup.ps1"
PowerShell -NoProfile -ExecutionPolicy Bypass -File "$env:TEMP\codex-client-setup.ps1"
Enter the following when prompted:
- API base URL: press Enter to use the default
https://cnapi.vip - API key: paste the key created in the cnAPI console
The script writes:
%USERPROFILE%\.codex\config.tomlThe script stores the cnAPI key in the active provider's experimental_bearer_token instead of relying on auth.json.OPENAI_API_KEY, avoiding API_KEY_REQUIRED / 401 Unauthorized errors in newer Codex builds.
macOS / Linux
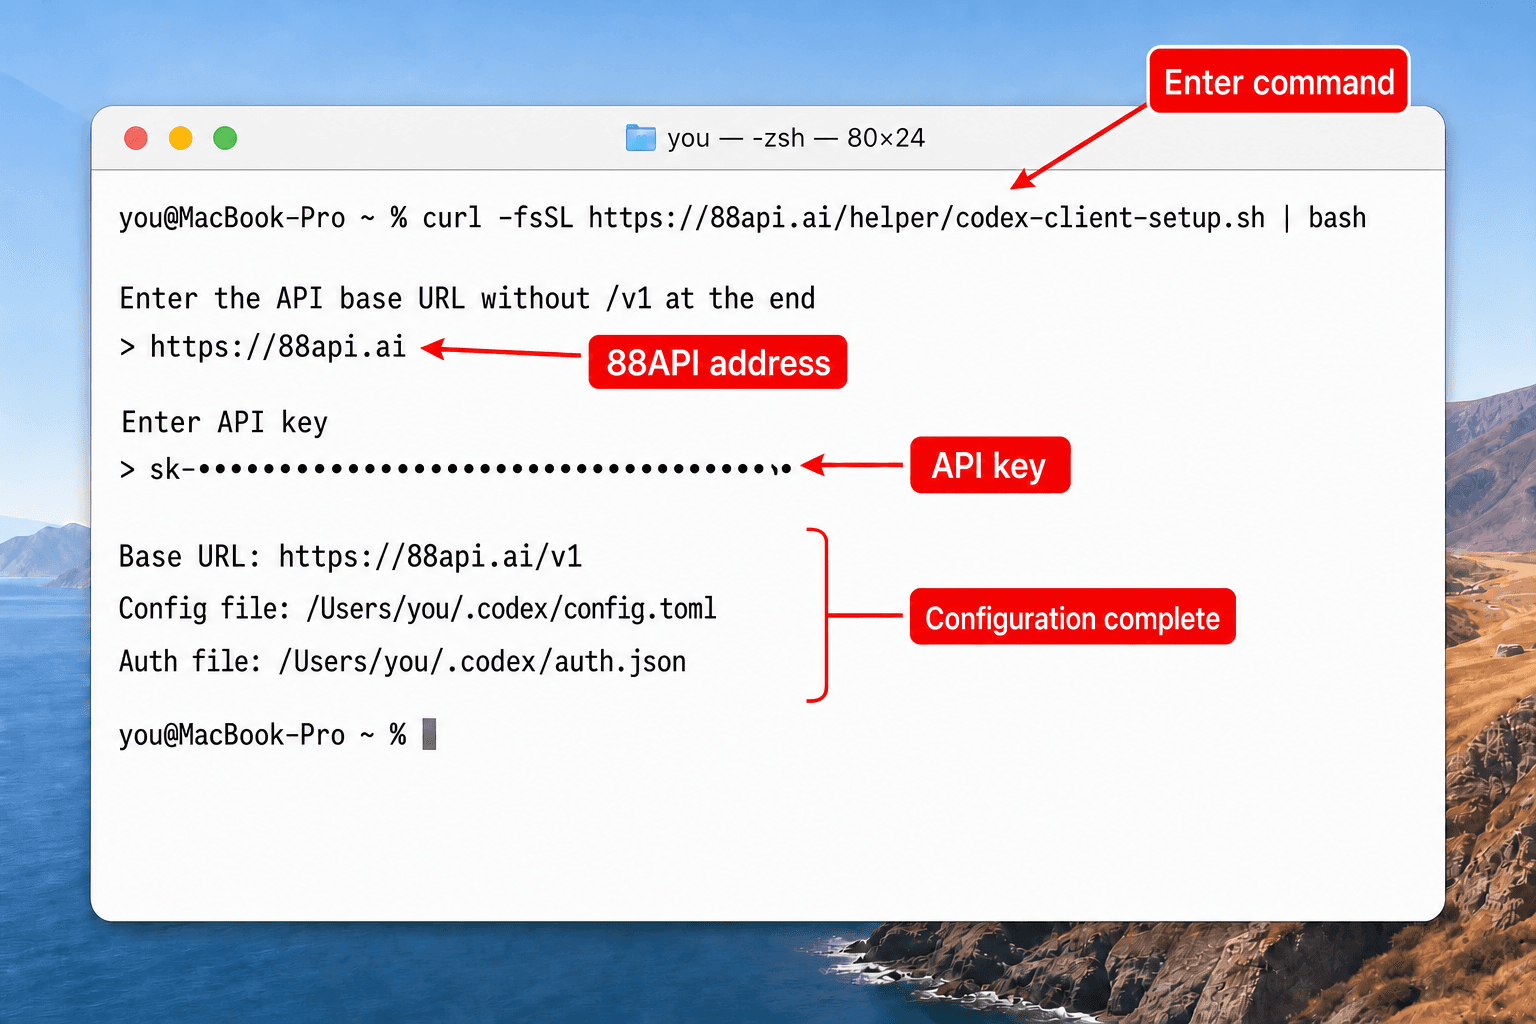
Open Terminal and run:
Configure Codex Client
bash <(curl -fsSL https://cnapi.vip/helper/codex-client-setup.sh)
Enter the following when prompted:
- API base URL: press Enter to use the default
https://cnapi.vip - API key: paste the key created in the cnAPI console
The script writes:
~/.codex/config.tomlManual Setup
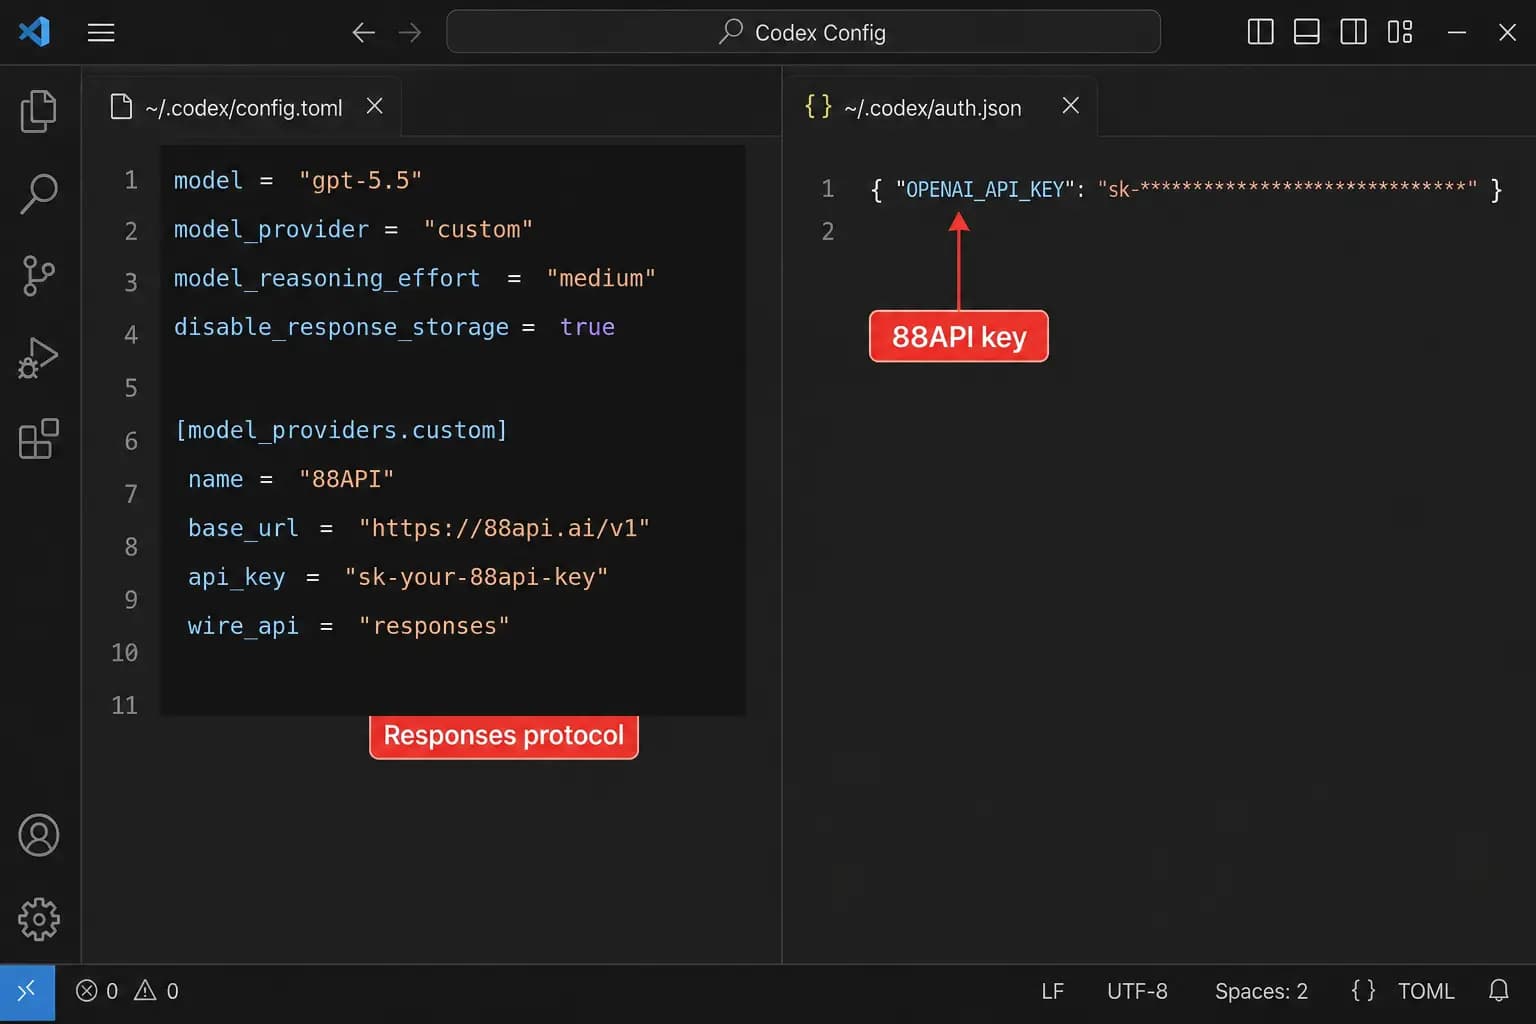
You can also create the files manually.
config.toml
Write this to ~/.codex/config.toml:
model = "gpt-5.6-sol"
model_provider = "cnapi"
model_reasoning_effort = "high"
disable_response_storage = true

[model_providers.cnapi]
name = "cnAPI"
base_url = "https://cnapi.vip/v1"
wire_api = "responses"
supports_websockets = false
experimental_bearer_token = "sk-your-cnapi-key"
auth.json
Do not put the cnAPI key in auth.json for the current Codex configuration. Keep auth.json only as the OpenAI account login cache; model requests should use the provider-scoped experimental_bearer_token in config.toml.
Start the Client
After configuration, reopen the Codex client or restart your IDE.
If the client is already running, fully quit and start it again so it reloads ~/.codex/config.toml and ~/.codex/auth.json.
Verify Requests
- Start a simple task in the Codex client.
- Open the cnAPI console.
- Check Usage Logs for the corresponding request.
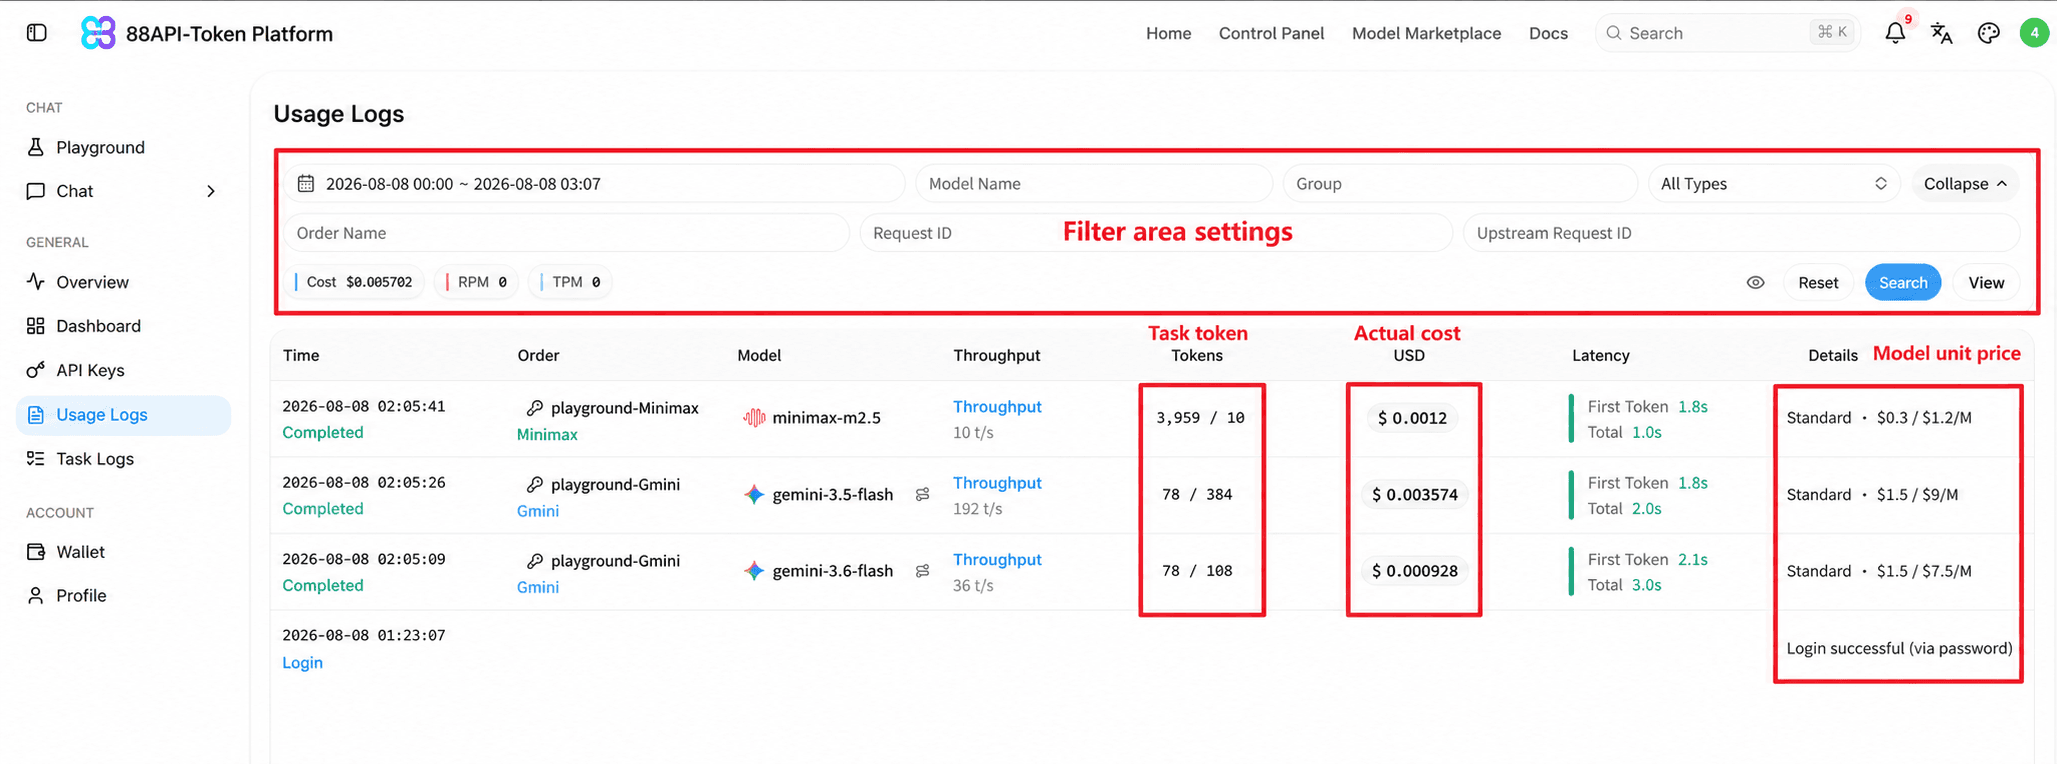
If the request appears in Usage Logs, the Codex client is using the cnAPI relay.
Troubleshooting
The client still uses the official account
Confirm that the client supports the local ~/.codex configuration. Some official cloud Codex entries only use ChatGPT account login and do not support a third-party API endpoint, so they cannot be relayed through cnAPI.
Authentication failed
Check that OPENAI_API_KEY in auth.json is complete and has no leading or trailing spaces or line breaks.
Model unavailable
Confirm that your cnAPI account can use gpt-5.6-sol. If your account uses a different Codex-compatible model, update the model field in config.toml.
Changes do not take effect
Fully quit the Codex client or IDE and reopen it. If needed, remove old official login cache and run the one-click setup script again.
How is this guide?
Last updated on